| Topic | Quick Answer |
|---|---|
| Average Level 2 home charger cost (equipment) | $400 – $900 for most Colorado Springs homes |
| Typical professional installation range | $800 – $2,000, depending on panel, wiring, and distance |
| Permits required in Colorado Springs | Yes, electrical permit is needed for most permanent installs |
| DIY allowed? | Legally sometimes, but not smart for most people |
| Timeline | 1 – 3 weeks from estimate to final inspection, often faster |
| Best charger level for home | Level 2, 240V, hardwired or NEMA 14-50 plug |
| Impact on home value | Often small but real bump, especially in higher price ranges |
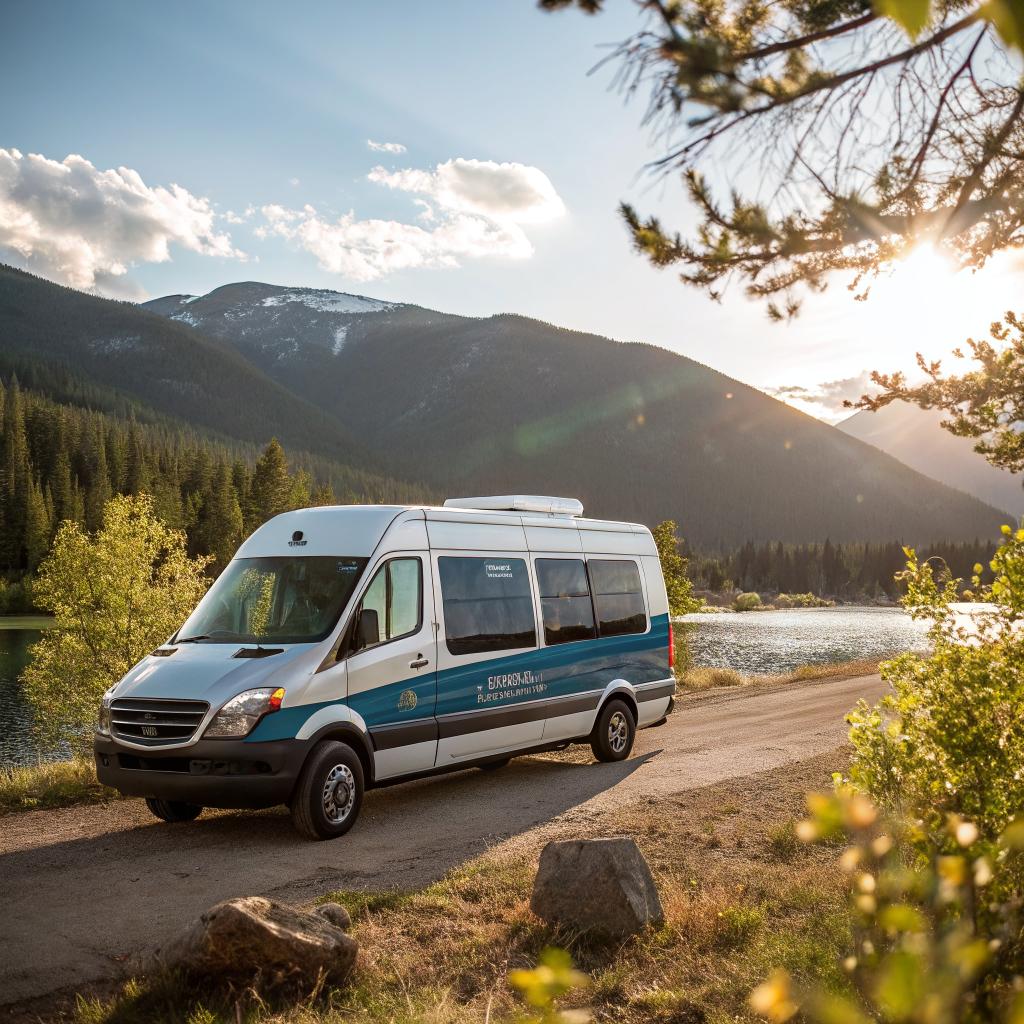
| Key local factor | Cold winters reduce range, so home charging matters more |
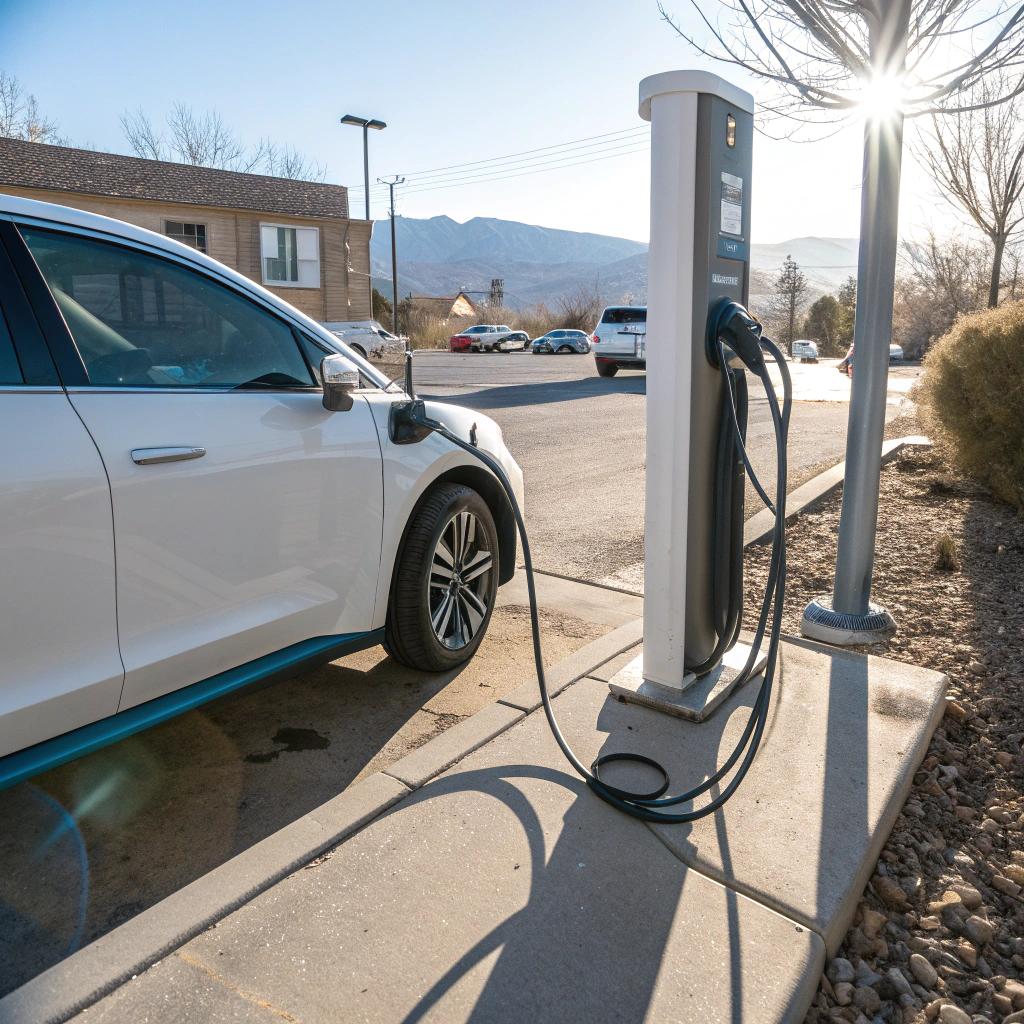
If you just want the short version, here it is: for most homeowners, the smartest path is a professionally installed Level 2 charger in the garage, fed from your main panel, checked against your existing loads, permitted through the city, and handled by a local electrician who already knows Colorado Springs codes and weather quirks. A service like Dr Electric Colorado Springs gets you from decision to inspection without you having to learn the National Electrical Code on your evenings and weekends. The rest of this guide simply walks you through what that actually means, what decisions you really need to make, and where you can save money without doing anything risky.
Why EV charger installation in Colorado Springs feels more confusing than it should
If you are like most people I talk with, the car decision actually feels simpler than the charger decision.
The dealer says the car will charge at home. The brochure shows a nice photo of a cable on a clean garage wall. Then you get home, stare at your breaker panel, and realize you have no idea what any of it means.
You might ask yourself things like:
– Do I really need a Level 2 charger, or is the outlet that came with the car enough?
– Will this trip my breakers all the time?
– Is my house too old for this?
– Am I about to spend way more than I need to?
Those are fair questions. They are also business questions, in a sense: you are investing in an asset and the wiring that supports it. You want it safe, predictable, and not more expensive than it has to be.
Let me walk through this in a way that stays practical, without pretending there is one perfect answer for every home.
Understanding EV charger levels without the jargon
Level 1 vs Level 2 vs DC fast charging
Here is how home charging really shakes out for most Colorado Springs drivers.
| Charger Type | Power Source | Typical Charge Speed | Where It Makes Sense |
|---|---|---|---|
| Level 1 | 120V standard outlet | 3 – 5 miles of range per hour | Very low daily mileage, patient drivers, temporary setups |
| Level 2 | 240V dedicated circuit | 20 – 40 miles of range per hour | Normal commuting, families, long-term home use |
| DC Fast Charging | High-voltage commercial stations | 60 – 200+ miles in 30 minutes | Road trips, occasional use, not a home solution |
For most Colorado Springs homes, Level 2 is the real goal. Level 1 can work if you:
– Drive very little
– Have multiple days to refill the battery
– Treat the car more like a local runabout
But cold winters here eat into your range. Battery preheating and cabin heating use energy. That slow Level 1 trickle does not always keep up when your schedule changes or when you add a second driver in the household.
Level 2 gives you normal life flexibility. You get home in the evening with a mostly empty battery, plug in, and wake up with a full one. That is the feeling people want.
How Colorado Springs weather and housing stock affect your install
This is where EV charging in Colorado Springs is not quite the same as in a mild coastal city.
Cold weather and elevation
Cold knocks range down. Elevation and mountain driving can add higher loads, even if you get some of it back on the downhill.
What that means for your charger:
If your range drops in winter, having faster home charging is not just a luxury, it protects your schedule from surprise “I guess I do not have enough range” mornings.
Here is how cold and charging speed relate for most drivers:
| Winter Use Pattern | Risk with Level 1 | Level 2 Value |
|---|---|---|
| Short in-town trips only | Low to medium | Nice, but not critical |
| Daily commute 20 – 40 miles | Medium, especially in snow days | Strong benefit, better margin |
| Frequent trips to Denver / mountains | High, easy to fall behind on charging | Very high benefit |
Older panels and garages
A lot of Colorado Springs homes still have:
– 100 amp service
– Older breaker panels
– Detached garages or carports
That does not automatically block you from installing a charger, but it does change the plan.
For example, with a 100 amp service, you might hear an electrician say you need a panel upgrade before adding any new high draw circuit. That is sometimes true, and sometimes not.
I have seen homeowners assume they must upgrade to 200 amp service, then later learn a load calculation showed they could safely fit a 40 amp EV circuit without the big upgrade. The key is actual math, not guesswork.
Step by step: how a typical EV charger project runs in Colorado Springs
Let me lay this out in a simple sequence. There is some variation, but this is roughly how it goes when the job is done thoughtfully.
1. Clarify your real driving and charging needs
Before calling anyone, spend 10 minutes thinking through a few questions:
– How many miles do you usually drive per day?
– How many hours is the car at home and parked overnight?
– Do you plan a second EV in the next few years?
– Do you want to charge faster or just “fast enough”?
You do not need perfect answers. Even rough estimates help.
The right charger for you is not the “biggest you can get”, it is the one that fits your driving, your panel, and your budget without creating stress.
If your daily driving is low and you are disciplined, you might live with a slower charger and save on installation. If you run a growing business, juggle family schedules, and already feel stretched, paying more for speed can actually protect your time.
2. Check your electrical panel, at least at a surface level
You do not have to become an electrician, but take a quick look at your panel.
Things to note:
– Total service size (often a label like “100A” or “200A” on the main breaker)
– How many spare breaker spaces you have
– Any obvious signs of age or rust
Then, do not overinterpret what you see. It is easy to panic when you see a mostly full panel, but tandem breakers and load calculations can change the picture.
If you are curious, here is a rough idea of what different setups often allow:
| Service Size | Charger Circuit Likely Feasible | Comment |
|---|---|---|
| 60 amp | Sometimes 20 – 30 amp, often very tight | May push you toward a service upgrade |
| 100 amp | 30 – 40 amp in some homes | Needs a proper load calculation |
| 150 / 200 amp | 40 – 60 amp commonly workable | Plenty of homes can support a strong Level 2 |
This is not a promise. It is just a mental reference point.
3. Decide on plug in vs hardwired
At this step, you are choosing between two common home setups.
- NEMA 14-50 outlet with a plug in EV charger
- Hardwired wall mounted EV charger
Each has tradeoffs.
NEMA 14-50 outlet setup
Pros:
– Flexible if you move the charger later
– Useful for RVs or other 240V loads
– Sometimes cheaper on equipment
Cons:
– Plug and outlet are extra wear points
– Some cars will derate output on plug in chargers
– Code in some cases limits breaker size
Hardwired charger
Pros:
– Clean, permanent connection
– Often supports higher current
– Fewer failure points
Cons:
– Less flexible if you move
– Slightly more labor in many cases
For many Colorado Springs homes, the decision comes down to two simple questions:
1. Do you see yourself moving within a few years?
2. Do you want the option to take the charger with you or repurpose the circuit?
If you think you will move soon, a NEMA 14-50 with a plug in charger can be reasonable. If this is your long term home, hardwiring the unit often feels more solid.
4. Schedule estimates with local electricians
This is the point where people sometimes make a mistake. They call one electrician, get one price, and either say yes under pressure or delay for months because the number scared them.
High level advice:
- Get at least two estimates, three is better.
- Ask for a clear line item breakdown: charger circuit, panel work, trenching if needed.
- Ask who handles the permit and inspection.
- Ask about panel capacity and future loads, like a second EV or hot tub.
Good electricians in Colorado Springs have seen many EV installs by now. They usually already recognize the common patterns:
– Short, simple run from panel to garage wall
– Panel on the opposite side of the house from the garage
– Detached garage needing trenching or overhead feed
You might be tempted to pick only on price. I would be a bit careful with that. Saving a few hundred dollars does not feel great if you end up with nuisance breaker trips, sloppy conduit, or confusing labeling.
5. Permits and inspections in Colorado Springs
Colorado Springs requires permits for most permanent electrical work. That includes EV chargers.
In simple terms:
For a permanent Level 2 charger, plan on a permit, an inspection, and an electrician who is comfortable working with local code and the permitting office.
Most homeowners let the electrician pull the permit. That is usually the cleanest approach. Expect:
– Permit application
– Installation day
– Inspection visit from the city or county
The inspection is not there to make your life harder. It is there to catch dangerous work and protect you from what you cannot see behind the walls.
6. Installation day realities
On install day, a few practical things happen that do not always show up in marketing brochures:
– Power may be off for part of the day, especially while working in the panel
– There will be some drilling, conduit, or cable routing
– Your garage might look like a small construction site for a few hours
Common pieces of work:
- Running conduit along the garage or exterior wall
- Penetrating the wall between the panel and the garage
- Mounting the charger at a height that fits your car ports
- Labeling the new breaker clearly
If the garage is finished with drywall, the electrician may try to route wiring with as few visible changes as possible. That said, sometimes the cleanest electrical solution means a bit of visible conduit. I have seen homeowners obsess about hiding every inch, then later realize the charger itself is the real visual focal point, not the pipe.
What does EV charger installation actually cost in Colorado Springs?
This is where people want straight numbers, and I will give them, but I want you to read them as ranges, not promises.
| Scenario | Charger Equipment | Labor & Materials | Typical Total |
|---|---|---|---|
| Simple install, panel in garage, short run | $400 – $900 | $400 – $800 | $800 – $1,700 |
| Average home, some conduit, modest panel work | $400 – $900 | $800 – $1,300 | $1,200 – $2,200 |
| Panel upgrade needed, longer cable runs | $400 – $900 | $1,800 – $3,500+ | $2,200 – $4,400+ |
Those numbers reflect typical projects, not the extremes.
Ways to avoid overpaying:
– Do not oversize the charger “just because.” If your car takes 40 amps maximum, a 60 amp circuit is not mandatory.
– Think about charger location. Every foot of trench or conduit has a cost.
– Consider future loads now, not later. A slightly larger panel upgrade now can be cheaper than repeating work in two years.
Choosing the right charger unit for your life and budget
There are many charger brands. Some emphasize smart features. Others lean on simplicity.
Here are the choices that matter more than the logo on the front.
Amperage and charging speed
For a Level 2 charger, you will see ratings like 32 amps, 40 amps, 48 amps, 50 amps, and so on.
As a rough guide:
| Charger Rating | Approx Range per Hour | Common Circuit Breaker |
|---|---|---|
| 32A | 20 – 25 miles | 40A |
| 40A | 25 – 30 miles | 50A |
| 48A | 30 – 35 miles | 60A |
Your car will also have a maximum onboard charging rate. A 48 amp charger on a car that only accepts 32 amps will still work, but you will not see the “extra” speed.
My personal take: for most daily drivers, something in the 32 to 40 amp range balances cost, panel load, and charging speed quite well.
Smart features vs simple charging
Many chargers now come with:
– WiFi or Ethernet connectivity
– Smartphone apps
– Scheduling and charge rate control
– Energy use tracking
These can be genuinely useful if you:
– Want to charge only in off-peak hours
– Track costs for business mileage
– Integrate with solar later
They can also feel like extra complexity for someone who just wants “plug it in and walk away.”
If you tend to forget to plug things in or enjoy data, you will probably like the smart features. If you often ignore phone apps after a week, you might be fine with a simpler model.
Indoor vs outdoor rating
Colorado Springs swings between hot, dry days and cold, snowy nights. If your charger will sit outdoors or in a breezy carport, look for:
– Proper outdoor rating (NEMA enclosure rating)
– Cable that stays flexible enough in the cold
Your electrician can mount the unit in a way that protects it from direct snow and ice, but buying a charger meant only for a climate controlled space is asking for early failure.
How an EV charger fits into your overall home and business life
This might sound like a stretch at first, but how you handle this project can mirror how you handle other long term decisions.
Time vs money tradeoff
You can think of EV charging this way:
– Level 1 is low money, higher time cost. Slow, but cheap to set up.
– A properly installed Level 2 has higher upfront cost, lower ongoing time stress.
If your days are already full with work, family, or business, your time is probably more scarce than the extra few hundred dollars spread over many years of ownership.
Resale and rental perspective
For a single family home, a well installed EV charger or at least a ready circuit often becomes a small selling point.
Is it going to add tens of thousands to your price? No, and anyone promising that is overstating it. It does, however, do a few helpful things:
– Signals the home is current with modern needs
– Reduces friction for buyers already driving EVs
– Pairs well with other upgrades like solar or modern HVAC
If you rent the property, check with a local real estate professional or property manager. In some segments, “EV ready garage” can help your listing stand out to a certain type of tenant, particularly those with stable incomes and long term plans.
Common mistakes Colorado Springs homeowners make with EV chargers
It might help to see where people go wrong. That can guide you away from trouble.
1. Treating it like plugging in a space heater
An EV charger is a high and sustained load. It is not like adding one more lamp.
Mistake pattern:
– Using an old, shared 120V circuit for Level 1 charging
– Long extension cords tucked around the garage
– Outlets that already serve a freezer or tools
This can stress wires and breakers quietly over time.
2. Ignoring the panel capacity question
Some homeowners buy and mount a charger first, then call someone to “hook it up.” The electrician arrives, checks the panel, and has to give bad news: the existing service cannot support the charger safely without upgrades.
This sequence often feels more painful than starting with an assessment and designing both together.
3. Focusing only on the nearest wall
The obvious mounting point is not always the smartest. For example:
– If the panel is on the opposite side of the house, a slightly shifted charger location could cut conduit length a lot.
– If you may get a second EV, choosing a location between two parking spots can save future rewiring.
Thinking about cable reach and second vehicles now costs nothing. Moving heavy gauge wiring later can be expensive.
4. Overbuying on features, underthinking on basics
I have seen people obsess over whether their charger integrates with a smart home platform, then forget to ask about:
– Breaker size
– Load calculation
– How the charger will be protected from snow
The basics are not glamorous, but they keep your home and car safe.
Permits, inspections, and safety: not just red tape
I know permits feel annoying. The forms, the wait, the idea of someone else checking your house.
But there is a simple truth here:
A permit and inspection are not a favor to the city, they are a protection for you, your property, and whoever buys your home next.
Here is what safety really means in this context:
– Wire sized correctly for the breaker and load
– Connections made in the right type of boxes
– Proper grounding and bonding
– Breakers that trip when they should
Most of this is invisible once the work is done. That is why you cannot judge safety by how “neat” something looks from the outside.
If you ever sell your home, permitted work also avoids awkward questions in the inspection report. Unpermitted high power circuits can raise flags for buyers.
When does DIY make sense, and when is it a bad idea?
Some homeowners are skilled and patient. They wire sheds, replace fixtures, and feel at home inside a panel with the power off.
I am not going to say all DIY is wrong, because that is not honest. There are people who can do this work safely and pass inspection.
But there are also some realities:
– EV circuits involve long runs of heavy gauge wire
– Mistakes can stay hidden until a high load day
– Working in the main panel carries real risk
If you have to watch multiple videos just to identify the main breaker, this is probably not the project to learn on.
Better places to experiment with DIY:
– Low voltage work like data cabling
– Simple lighting swaps on existing circuits
– Smart switches with proper guidance
For a high current, continuous load circuit, the margin for error narrows.
Planning for the future: second EVs, solar, and lifestyle shifts
Many people who install one home charger end up:
– Adding a second EV within five years
– Exploring solar panels for part of their home power
– Making more remote work or home office choices
If you see any of that on your horizon, you can ask your electrician a few future focused questions now:
- Can this panel support a second EV circuit later?
- Should we run conduit that can hold another cable in the future?
- Is there a neat way to leave space for a future solar tie in?
It might sound like overplanning, but even something as simple as:
– Slightly upsizing conduit diameter
– Leaving extra breaker space on one side of the panel
– Mounting the first charger in a spot that allows a second
can save hundreds or thousands of dollars later.
Practical examples from common Colorado Springs home types
Sometimes specific examples help more than theory. Here are a few typical patterns.
Newer suburban home with attached garage
– 200 amp panel in the basement
– Garage on the same side of the house
– Unfinished or partly finished basement ceiling
Likely plan:
– Run 240V circuit from panel through basement ceiling
– Drill up into garage wall
– Mount Level 2 charger near front of vehicle parking spot
– 40 or 50 amp breaker, depending on charger and load calculation
This is usually one of the smoother project types.
Older home with detached garage
– 100 amp main service
– Overhead or underground feed to a detached garage
– Limited spare breaker space
Possible approach:
– Evaluate panel for available capacity
– If older subpanel in garage exists, check condition and rating
– Sometimes install new subpanel in garage fed from main
– Run conduit underground if current feed is undersized
This is where costs can climb, but also where a smart layout can keep them in check.
Townhome or condo
This is the most variable, and sometimes the most frustrating.
Questions to sort out:
– Do you own the garage space or is it shared?
– Where is your meter and main breaker located?
– Does the HOA allow new conduit or wall mounted chargers?
Some HOAs now have written EV policies, others do not yet. This is one area where patience and clear communication matter. I have seen projects delayed for months just because no one in the building knew who could approve a change.
How to talk with your electrician so you get the right outcome
You do not need technical language, but being clear on your goals helps.
You might say things like:
– “My daily commute is about 25 miles, but sometimes I do long weekend drives.”
– “I would like to have room in the panel for a second EV in a few years.”
– “I care more about reliability and safety than about smart features.”
And then ask:
– “What charger size would you recommend for this panel and my driving?”
– “Do you see any need for a panel upgrade now or soon?”
– “How will this be permitted and inspected?”
If something sounds vague, push for clarity. For example, if you hear “should be fine”, you can respond with “Can you walk me through the load calculation that supports that?”
That is not being difficult. That is being responsible.
Q & A: common questions about EV charger installation in Colorado Springs
Can my 100 amp service really handle an EV charger?
Sometimes yes, sometimes no. It depends on your existing large loads, like electric heat, electric water heaters, and ranges. A licensed electrician can perform a load calculation. If your big appliances are gas, you have a better chance of fitting a 30 or 40 amp charger without upgrading service.
Will charging my EV skyrocket my electric bill?
Your bill will go up compared to not owning an EV. The better question is whether the energy cost is lower than what you used to pay for gas. In many cases, even with Colorado electricity prices, cost per mile is lower with an EV, especially if you charge mostly at home and not on commercial fast chargers.
Does a home charger harm my battery over time?
Normal Level 2 charging is what most EVs are designed for. If anything, regular moderate speed home charging is easier on the battery than frequent DC fast charging. If you avoid charging to 100 percent every single night and let the car manage its own battery conditioning, you are already in good shape.
Should I wait until I buy my next EV before installing a charger?
If your current EV is your main car and you plan to stay in the home for several years, waiting often keeps you stuck with slow or unreliable charging. Most modern chargers work fine across car brands. If you expect a move within a year, then being cautious and perhaps choosing a more portable setup might be reasonable.
What if my garage is not insulated or finished?
You can still install a charger. Cold temperatures might make the cable stiffer, but quality outdoor rated chargers handle it. If you plan to insulate or finish the garage later, you can ask your electrician to route conduit in ways that will not fight that future work.
Can I plug my EV into the same outlet as my garage freezer?
That is usually a bad idea. Freezers and EVs on the same standard 120V circuit can push past what the wiring and breaker are meant to handle, especially over long charging sessions. That is the type of setup that leads to tripped breakers or hidden heat in the wiring. A dedicated circuit is the safer choice.
If you step back, the guiding idea is simple: you want EV charging at home to feel as boring and predictable as flipping on a light. No drama, no surprises, no constant tinkering. With a thoughtful installation, that is exactly what it can become.